How to Epoxy a Garage Floor: Step-by-Step Guide
A real step-by-step for epoxying a garage floor yourself, the prep that makes or breaks it, and the point where hiring a North Texas crew makes more sense.
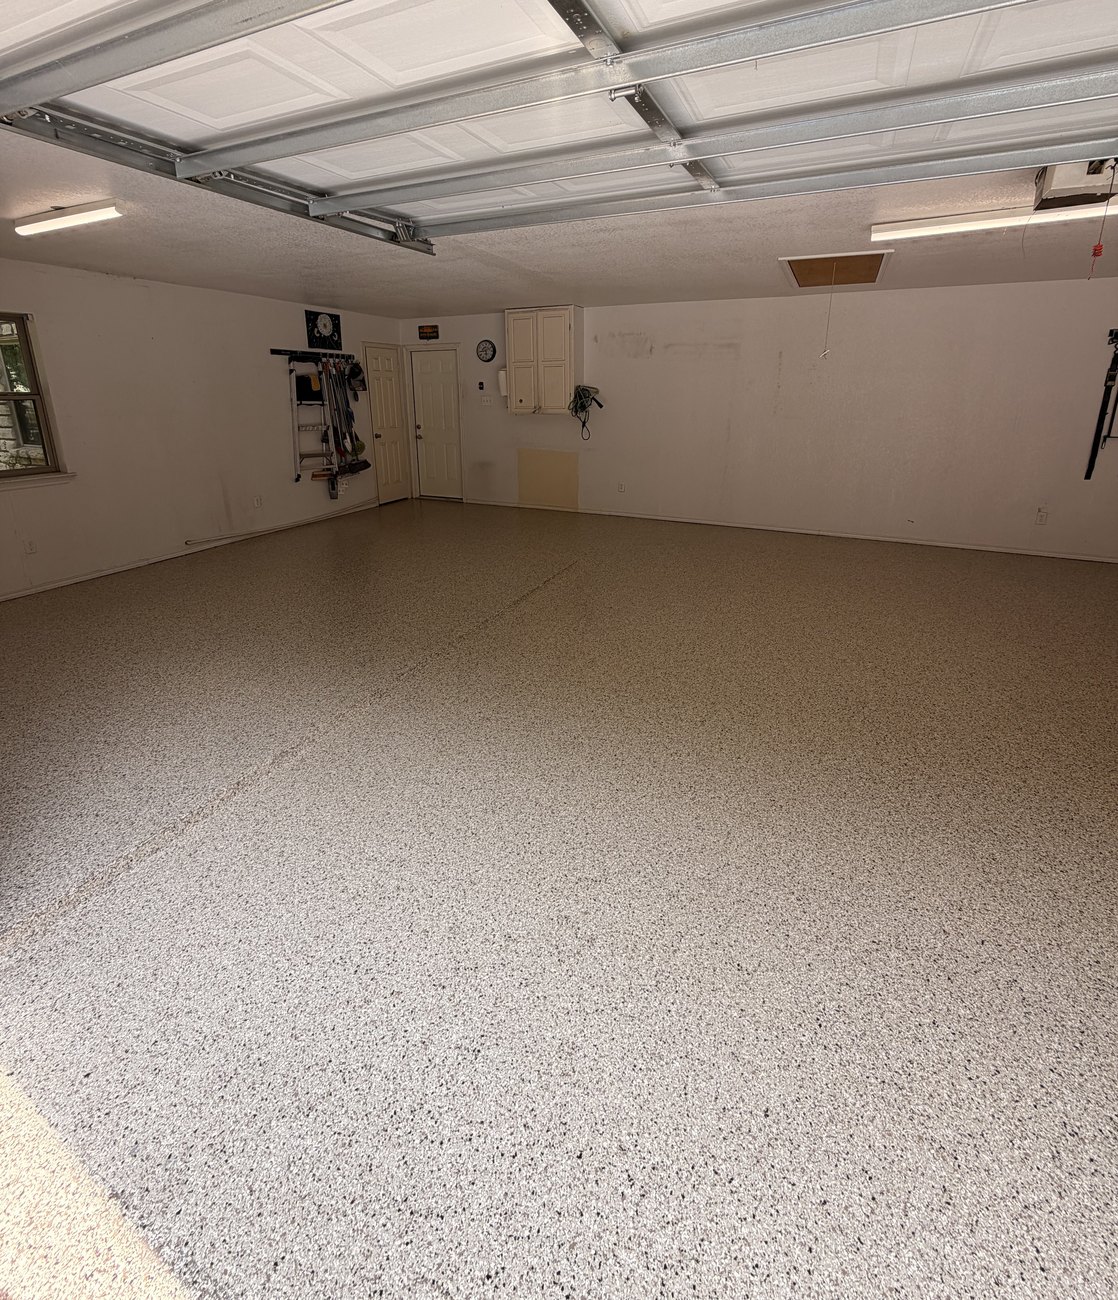
Epoxying a garage floor looks like a weekend job in the YouTube videos. Roll on a coat, toss some flakes, and call it done. The rolling is the easy part. The prep before it and the topcoat after are what decide whether the floor lasts ten years or peels by next summer.
The real process runs eight steps. The honest version also covers where a hardware-store kit falls short in our heat, and the point where handing it off makes more sense.
What you’re signing up for
A DIY epoxy floor on a two-car garage takes a full weekend, sometimes two, and the result depends on prep. Rush the grind or skip the moisture test and the coating lifts. Take your time and a kit can look good for a few years. For a floor that lasts 15 to 20+ years, the full professional system uses tougher materials, but the steps below are the same shape.
Step 1: Clear and clean the garage
Empty it out, every last box. Sweep the slab, then scrub it with a degreaser to pull out oil and grime. Any spot you leave greasy is a spot the epoxy won’t grab. Let it dry.
Step 2: Test for moisture
Tape a two-foot square of plastic sheeting to the slab and leave it overnight. Find condensation under it in the morning and your slab is pushing moisture, which means epoxy laid over it will peel from below. A moisture problem changes the whole plan, so catch it before you buy materials.
Step 3: Prep the concrete
Your prep decides how long the floor lasts. The kits hand you a jug of acid etch, which roughs the surface a little. A diamond grinder does far more, opening the concrete so the coating bonds into it instead of sitting on top. Rent a grinder if you’re serious. If you etch, follow the instructions to the letter, rinse well, and let it dry. A smooth or dusty slab is the top reason coatings fail.
Step 4: Repair cracks and joints
Fill cracks and gouges with a concrete patch or an epoxy crack filler, and knock down any high spots. A coating won’t hide a crack; it telegraphs straight through. Fix these before you coat.
Step 5: Mix and roll the base coat
Epoxy is a two-part product. Mix the resin and hardener in the exact ratio, and the clock starts the moment you do. Cut in the edges with a brush, then roll the base across the floor in sections, working toward the door so you don’t paint yourself into a corner. Keep a wet edge and move at a steady pace.
Step 6: Broadcast the flake
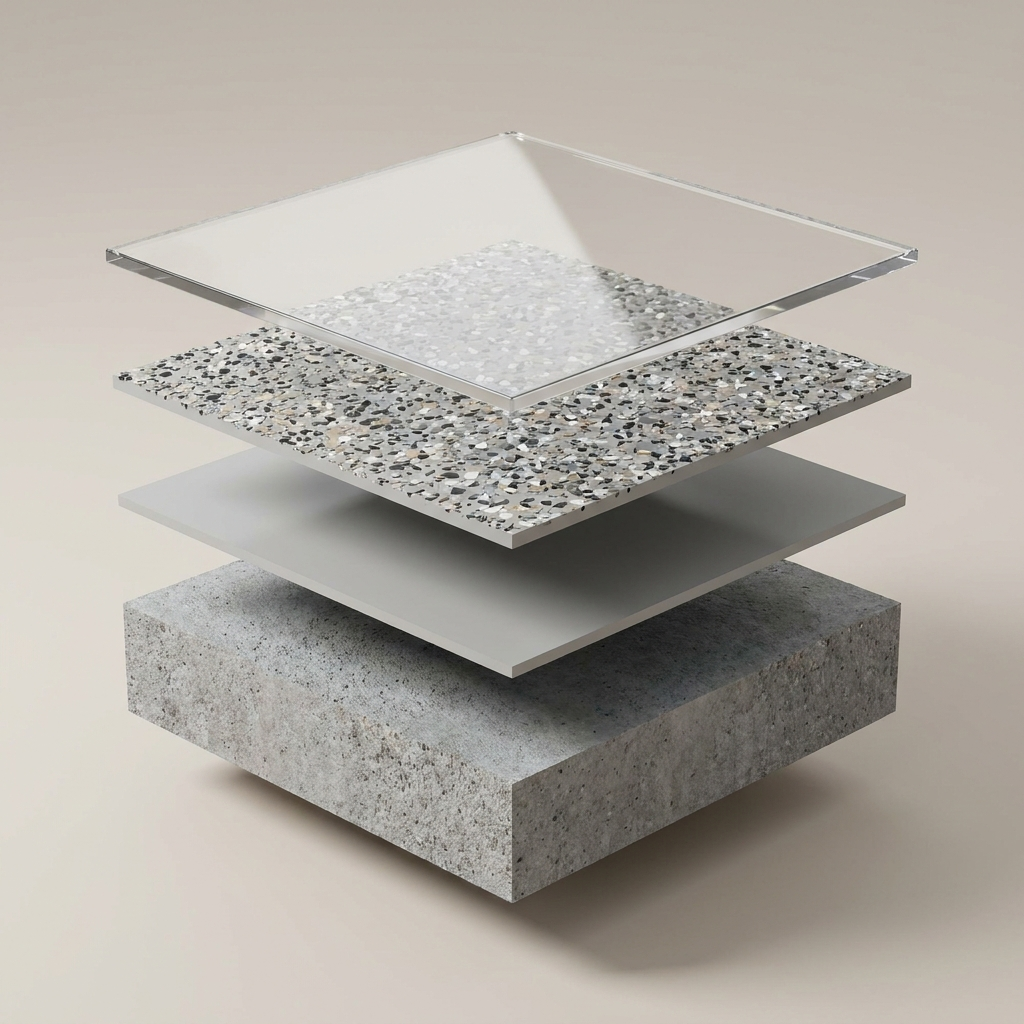
Adding color flake happens now, while the base is wet. Toss it up and out so it floats down flat instead of clumping, and put down more than you think you need, edge to edge. Once the base cures, you scrape the loose flake and sweep it up. Flake adds grip and hides wear, and you can match it to any look you want. See the flake colors for the range.
Step 7: Seal it with a topcoat
The cheap kits skip this step, and that’s why their floors yellow and scratch. A clear topcoat protects the base and the flake. In Texas the topcoat worth using is polyaspartic, which stays clear under UV and takes hot-tire pickup. Roll it the same way as the base, keeping a wet edge.
Step 8: Let it cure
Walk on it after the topcoat sets, about a day. Wait longer before you park, since a fresh floor marks under hot tires. Read your product’s cure chart and give it the full time.
| Stage | Wait before |
|---|---|
| Foot traffic | 12 to 24 hours after topcoat |
| Light use | 2 to 3 days |
| Parking a vehicle | 3 to 7 days |
Where DIY kits fall short in Texas
Two steps sink most DIY floors here: the prep and the topcoat. Acid etch doesn’t bite like a grind, and most kits skip a real topcoat, so the floor yellows in the sun and lifts when a hot tire grabs it. The rolling in between is straightforward. The parts that decide how long the floor lasts are the parts a kit shortcuts.
Do the math before you buy the kit
Most people compare a $100 box to a professional quote and stop there. That’s not the comparison.
One kit covers about 250 square feet, so a two-car garage takes two. Then the box sends you back to the store for a degreaser, an anti-skid additive, a clear topcoat, and a moisture blocker if your slab needs one. Rent a grinder and the tooling and that’s another line item. Add your own weekend on your knees, and three days before you can park on it.
Now put that next to $6 a square foot for a ground slab, a high-build epoxy base, full flake, a polyaspartic topcoat, and a written warranty. The gap is usually smaller than people expect, and one of those floors comes with somebody on the hook if it fails. We pulled the published spec sheets apart in what the DIY kits don’t tell you if you want the numbers.
When to hire it out
Hand it off when any of these is true: your slab failed the moisture test, it’s cracked or pitted enough to need real repair, or you want a floor you coat once and forget. A crew brings a diamond grinder, commercial-grade epoxy, and a polyaspartic topcoat, and finishes a two-car garage in two days. We lay out what that costs in our garage floor cost guide, and you can see the two-day process on our Granbury page.
If you’re in Granbury, Weatherford, Aledo, Stephenville, or Glen Rose, send us the size of your garage and we’ll get you a number. If you’d rather do it yourself, the steps above are the ones that matter.
The bottom line
Epoxying a garage floor yourself comes down to two things the videos gloss over: grinding the slab and sealing it with a real topcoat. Handle those and a kit can look sharp for a few years. Skip them and you’ll be scraping it up before long. If your slab is damp or cracked, or you’d rather the floor last a couple decades, that’s the point to call a crew.
Common questions
Can I epoxy my garage floor myself?
Yes, a basic kit on a sound, dry slab is a weekend job. The result hinges on prep. If your slab has moisture or cracks, or you want a floor that lasts 15+ years, a professional system is the better call.
Do I need to grind the concrete or can I just etch it?
Etching works for a light DIY kit, but a diamond grind bonds far better and is what pros use. In the Texas heat, a ground floor holds up much longer than an etched one.
How long does it take to epoxy a garage floor?
A DIY two-car garage takes a full weekend or two, plus 3 to 7 days of cure before you park on it. A professional crew does the whole thing in two days.
Is it cheaper to epoxy a garage floor yourself?
Cheaper up front, yes. A two-car garage takes two kits, plus a degreaser, an anti-skid additive, a clear topcoat, a moisture blocker if your slab needs one, and a grinder rental if you prep it right. Add your own weekend and no warranty. Against $6 a square foot installed, the gap is smaller than the shelf price suggests.
Why do DIY epoxy floors peel?
Almost always prep or moisture. A slab that's smooth, dusty, or damp won't hold the coating, and skipping the topcoat lets the floor yellow and lift in the sun.